
Desserts
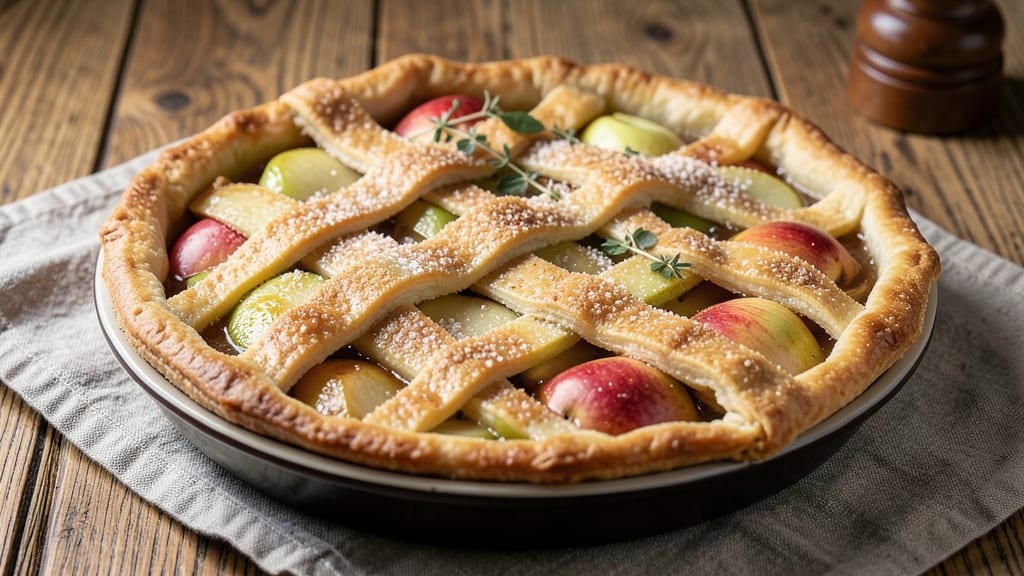
This standard apple pie recipe delivers the comforting, spiced aroma of a homestyle dessert that’s been passed down for generations. 🍏 The secret lies in a well-balanced filling—tender apples, warm cinnamon, and just the right amount of sugar—that creates a lattice crust with that perfect crunch and flaky texture.
I’ve perfected this recipe over years of baking, ensuring every slice has the ideal balance of sweet, tangy, and spiced flavors that make it a crowd-pleaser.
The crust is simple but essential: either homemade for that classic flakiness or store-bought for convenience, baked until golden and crisp.
The filling, made with a mix of tart and sweet apples, thickens beautifully with a touch of cornstarch, while the lattice design adds both visual appeal and that satisfying crunch. Baking at 375°F for 50-60 minutes ensures the filling is tender and the crust stays flaky, not soggy.
What sets this pie apart is the homestyle lattice, which creates pockets of caramelized apples and crispy crust in every bite. The aroma alone—warm spices, buttery crust, and ripe apples—will have your kitchen smelling like autumn.
Serve it warm with a scoop of vanilla ice cream or a drizzle of caramel for the ultimate dessert experience.
Whether you're baking for a family gathering or just craving a slice of nostalgia, this recipe delivers restaurant-quality results with a touch of home. The filling stays moist, the crust remains crisp, and the lattice adds that professional touch without the fuss. Let’s get baking!
Ingredients for standard apple pie
The heart of this pie—tart Granny Smiths, sweet Honeycrisp, and a lattice that sings with cinnamon and nutmeg.
| Ingredient | Amount | Notes |
|---|---|---|
| Granny Smith Apples 🍏 | 4 medium | Peeled, cored, sliced into 1/4-inch pieces |
| Honeycrisp Apples 🍏 | 4 medium | Peeled, cored, sliced into 1/4-inch pieces |
| All-Purpose Flour 🌾 | 3 ½ cups | For crust, plus extra for dusting |
| Unsalted Butter 🧈 | 1 cup | Cold, cubed, for crust |
| Granulated Sugar 🍚 | 1 ½ cups | For filling, plus extra for sprinkling |
| Light Brown Sugar 🍚 | ½ cup | Packed, for filling |
| Cornstarch 🌾 | ¼ cup | For thickening filling |
| Ground Cinnamon 🌶️ | 2 tsp | For filling, plus extra for lattice |
| Ground Nutmeg 🌶️ | ¼ tsp | Freshly grated preferred |
| Salt 🧂 | ½ tsp | Kosher or sea salt |
| Lemon Juice 🍋 | 1 tbsp | Freshly squeezed, for brightness |
| Vanilla Extract 🥄 | 1 tsp | Pure extract for flavor |
| Ice Water 💧 | ¼ cup | For dough handling |
The apples are non-negotiable. Granny Smith and Honeycrisp give that perfect balance of tang and sweetness—no substitutes here. Whole Foods or local orchards have the freshest, but grocery store apples work too if they're firm and vibrant. Peel them first to avoid a gummy filling. The cinnamon? Penzeys or bulk bins at natural stores have the best quality—none of that dusty stuff. And if you're using store-bought crust, Pillsbury Original or Guittard's are reliable choices for that buttery flakiness without the fuss.
No cornstarch? All-purpose flour at half the amount works, but your filling might be a tad thicker. Short on apples? Pears or a mix of Granny Smith and Braeburn keep the balance. The vanilla extract is where you can splurge—Nielsen-Massey or McCormick Pure make all the difference. And if you're making the dough from scratch, chill it for 30 minutes before rolling—trust me on this. The lattice strips should be about 1/2-inch wide for that classic look.
Store the pie at room temperature for up to 4 hours if serving warm, then refrigerate. Keeps for 5 days in the fridge, but honestly? It's best eaten within 2 days. Freeze for up to 3 months—wrap tightly in plastic and foil. The crust stays crispier if you reheat slices in the oven for 5-10 minutes at 350°F. And save those leftover lattice strips—toss them in the oven with butter for a quick snack.
Why You'll Love This Recipe
- No-Fuss Assembly: I swear by this recipe because it’s the kind of pie I can make while chatting with my neighbor—just slice the apples, toss them in a bowl, and fold in the sugar. The crust? Two ingredients, five minutes flat. (Yes, even on a Tuesday night.)
- Tart-Sweet Magic: Granny Smiths bring that sharp bite, Honeycrisp adds juicy sweetness, and a sprinkle of sugar ties it all together—like a hug from autumn. The butter in the crust? That golden, flaky finish? Absolute perfection.
- Crowd-Pleaser Always: This pie works for brunch with coffee, dessert after Thanksgiving, or even a lazy Sunday with ice cream. Honestly, I’ve served it at potlucks, school fundraisers, and my own kitchen table—no one’s ever turned it down.
- Leftovers That Last: A whole pie? More like a week’s worth of lunches. Slice it up, reheat in the oven, and it’s just as good the third day. (Between us, I’ve frozen slices for months—no one believes me when I say it.)
Step-by-step instructions for homestyle lattice apple pie
Here's the method for a classic apple lattice pie with perfect crust and spiced filling.
👨🍳 Step 1: Prepare the Apple Filling
In a large bowl, combine the 4 medium Granny Smith Apples and 4 medium Honeycrisp Apples (already peeled, cored, and sliced into ¼-inch pieces). The tart Granny Smith balances the sweet Honeycrisp, creating a perfect flavor profile. Add the 1.5 cups Granulated Sugar, 0.5 cup Light Brown Sugar, 0.25 cup Cornstarch, 2 tsp Ground Cinnamon, 0.25 tsp Ground Nutmeg, 0.5 tsp Salt, 1 tbsp Lemon Juice, and 1 tsp Vanilla Extract.
Gently toss the mixture until the apples are evenly coated with the spices and sugars. The lemon juice brightens the filling while preventing browning. Let it sit for 15 minutes at room temperature—this helps the flavors meld and the cornstarch begin thickening. Don't skip this step; it makes a noticeable difference in texture.
👨🍳 Step 2: Make the Pie Crust Dough
In a large mixing bowl, combine the 3.5 cups All-Purpose Flour and 0.5 tsp Salt. Cut in the 1 cup Unsalted Butter (cold, cubed) using a pastry cutter or your fingers until the mixture resembles coarse crumbs with pea-sized butter pieces. Add the 0.25 cup Ice Water gradually, mixing gently with a fork until the dough just comes together.
Turn the dough onto a lightly floured surface and knead lightly for 30 seconds—just enough to bring it together. Divide the dough into two equal portions, flatten into disks, wrap in plastic, and refrigerate for at least 1 hour. Chilling firms up the butter for easier rolling and prevents shrinking during baking. If you're short on time, chill for 30 minutes in the freezer.
🥘 Step 3: Assemble the Pie Crust
Preheat your oven to 375°F. Roll out one disk of chilled dough on a lightly floured surface to a 12-inch circle, about ⅛-inch thick. Transfer to a 9-inch pie dish, gently pressing it into the bottom and up the sides. Trim any excess dough hanging over the edge. Roll out the second disk similarly for the lattice top.
Spread the prepared apple filling evenly into the bottom crust, mounding it slightly in the center. Sprinkle with an extra ½ tsp Ground Cinnamon for that classic lattice look. Roll out the second dough disk into a 12-inch rectangle, then cut into 1-inch strips using a sharp knife or pizza cutter. Arrange the strips in a lattice pattern over the filling, alternating directions for a classic crisscross design.
🔥 Step 4: Bake to Golden Perfection
Place the assembled pie on a baking sheet (to catch any drips) and bake for 45-50 minutes until the crust is deep golden brown and the filling is bubbling. The edges should be set, but the center might still jiggle slightly—this is normal. If the crust starts browning too quickly, tent loosely with aluminum foil.
Remove the pie from the oven and let it cool for 2 hours before slicing. This resting period allows the filling to set properly and prevents a runny pie. The aroma filling your kitchen will be worth the wait—warm apple pie smells like home. Serve with vanilla ice cream or whipped cream for the ultimate classic dessert.
Pro Tips For Making Standard Apple Pie
- Skip the Pre-Cooking Slice: Mixing Granny Smith and Honeycrisp raw—no pre-slicing—keeps the filling crispier. I learned this the hard way after mushy batches from overhandling; just toss them whole, then cut after baking.
- Chill the Dough: Roll out the crust and refrigerate it 15 minutes before filling. This prevents shrinking and makes it easier to handle—no more struggling with sticky dough when you’re halfway through assembly.
- Use Cold Butter: Cut the butter into the flour mixture in small cubes, then toss with a fork until pea-sized. Cold butter creates flaky layers; if it melts into a paste, your crust will turn out greasy instead of golden.
- Vent the Top: Cut a few slits in the lattice or solid top crust before baking. Trapped steam makes soggy pie—even with a standard recipe, this small step guarantees a crisp finish every time.
Dietary considerations for this standard apple pie
Gluten-Free Adaptations
Swap the all-purpose flour crust for a gluten-free pie crust mix like King Arthur Measure for Measure or Bob's Red Mill 1-to-1. Use 1 cup gluten-free flour blend plus ¼ cup cornstarch for better texture.
Chill the dough longer—2 hours or overnight—since gluten-free doughs are more fragile. For the filling, no changes are needed as it’s naturally gluten-free. 🌾
Dairy-Free Options
Replace the butter in the crust with vegan butter like Miyoko's or Earth Balance. Use ½ cup coconut oil instead if you prefer a firmer texture.
For the filling, ensure your sugar and spices are certified dairy-free. The crust will still achieve that flaky texture, though it may brown slightly faster. 🧈
Lower Sugar Version
Reduce the granulated sugar to 1 cup and the brown sugar to ¼ cup for a lighter filling. Boost sweetness with 2 tbsp maple syrup or 1 tbsp honey while keeping the cinnamon and nutmeg at the same levels.
The apples’ natural sweetness will shine through, and the texture remains thick and cohesive. 🍚
Nut-Free Considerations
This recipe is already nut-free, but always double-check labels on store-bought ingredients like vanilla extract and pie crusts. If making the crust from scratch, ensure your butter and flour are nut-free certified. The filling’s spices and cornstarch are universally safe, so no substitutions are needed here. 🌶️
Vegan-Friendly Adjustments
For a fully vegan pie, use vegan butter in the crust and ensure your vanilla extract is alcohol-free (like Nielsen-Massey Pure Alcohol-Free).
The filling stays the same, but add 1 tbsp flaxseed meal mixed with 3 tbsp water as an egg substitute if you’re also avoiding dairy in the crust. The pie will still hold its shape beautifully. 🥄
Allergen-Free Tips
Always use separate utensils and clean surfaces when handling allergens like nuts or dairy. For cross-contamination, bake the pie on a parchment-lined tray and avoid shared tools.
If someone has a corn allergy, replace the cornstarch with arrowroot powder** in equal amounts. The filling’s thickness will be just as perfect. ✨
Nutrition facts
Frequently asked questions about homestyle apple pie
Can I use just one type of apple instead of Granny Smith and Honeycrisp?
You can, but the flavor balance will change. Use Braeburn for a sweeter pie or Fuji for extra juiciness. For tartness, stick with Granny Smith alone. The key is mixing tart and sweet apples to prevent a one-dimensional flavor. If using only one variety, add 1 extra teaspoon of lemon juice to brighten the filling.
Why did my pie crust turn out tough instead of flaky?
Overworking the dough or using warm butter are the most common culprits. Always keep butter cold and handle dough minimally. Chill the dough for at least 1 hour before rolling, and avoid pressing down on it while baking. If using store-bought crust, check the expiration date—old crust loses its flakiness.
How do I fix a soggy bottom crust?
Prevent it by baking the bottom crust (called "pre-baking") for 8-10 minutes at 375°F before adding filling. For a pie that's already baked, slice it and place the bottom pieces on a baking sheet. Broil for 2-3 minutes to crisp up. If the filling is too runny, it needs more cornstarch next time—aim for a thick, spoonable consistency before baking.
Can I make this pie ahead of time?
Assemble the pie (unbaked) up to 24 hours ahead and refrigerate. Bake straight from the fridge, adding 10-15 minutes to the baking time. For a fully baked pie, store at room temperature for up to 4 hours, then refrigerate. Reheat slices in the oven at 350°F for 5-10 minutes to restore crispness.
What's the best way to store leftovers?
Cool completely, then cover tightly with plastic wrap and foil. Store in the fridge for up to 5 days, or freeze for 3 months. To reheat, wrap a slice in foil and warm in the oven at 350°F for 8-10 minutes. Microwaving makes the crust soggy—always use the oven for best results.